
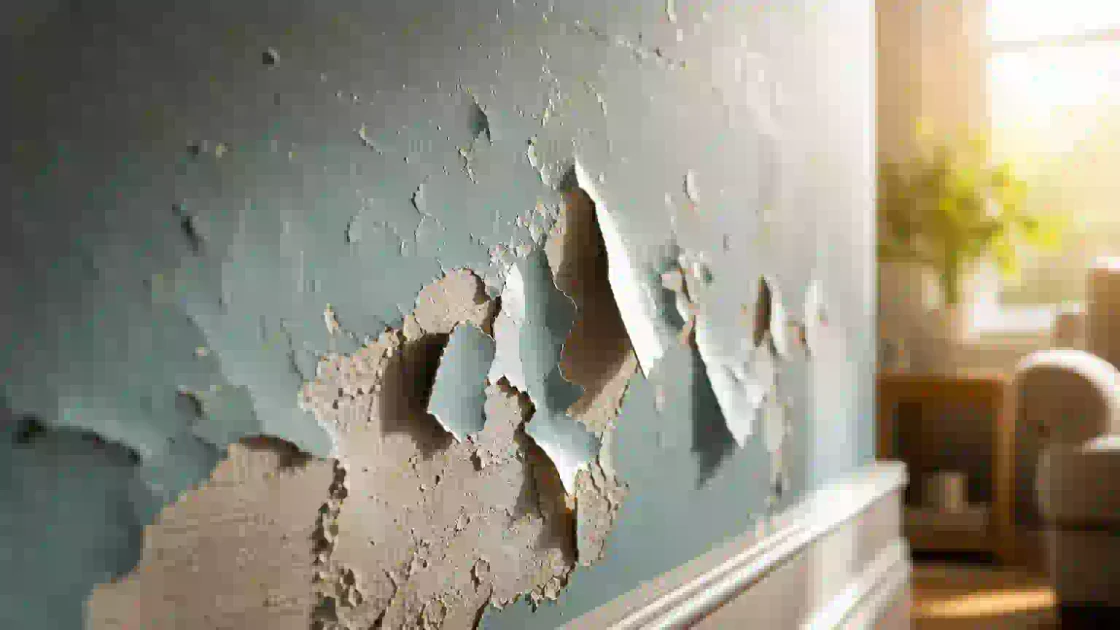
Why Is Paint Peeling on Walls: The Real Causes and Fixes for 2026
Most people blame cheap paint when their walls start shedding. That is almost never the real problem. In most homes, peeling comes down to moisture, surface prep failures, or incompatible coatings, issues that a more expensive gallon won’t fix.
The good news: once you know exactly why paint peels, fixing it is straightforward. This guide walks you through every cause, every repair step, and every mistake to avoid, so your next paint job stays put for 10 years or more.
What You Will Need Before You Start
Getting the right materials together before you touch a wall saves you two extra trips to the hardware store. Here is what you need for a solid repair:
- Flexible putty knife (3-inch or 6-inch, like a Red Devil or Hyde brand)
- 80-grit and 120-grit sandpaper or a sanding block
- Painter’s tape (3M ScotchBlue is reliable)
- Primer, oil-based for moisture-prone areas, shellac-based (Zinsser BIN) for severe stains
- High-quality latex paint rated for your surface (interior or exterior)
- Joint compound or spackling paste for filling gaps
- A moisture meter (around $20-$40 at any home center)
- Clean rags and a bucket of warm soapy water
- Safety glasses and an N95 dust mask
That moisture meter is not optional if you suspect a leak. Guessing costs you a second repair job within 12 months.
The Main Reasons Paint Peels Off Walls
Here is the uncomfortable truth: in my experience diagnosing peeling walls for homeowners, moisture is the culprit at least 70% of the time. The other 30% splits between poor surface prep and paint-over-paint incompatibility.
Moisture sneaks in several ways. A bathroom without proper ventilation traps steam against the wall. A slow roof leak soaks drywall for weeks before you notice bubbling. Even condensation on cold exterior walls in winter can saturate the top coat from behind. Water breaks the adhesive bond between paint and substrate, and once that bond fails, peeling spreads fast, sometimes 2 to 3 square feet per month.
Poor prep is the second big offender. Painting over a dusty, greasy, or glossy surface is like sticking tape to a wet glass. The paint never grips. Kitchens are notorious for this because cooking oils create an invisible film that standard washing often misses.
The third cause is layering incompatible coatings. Oil-based paint applied over latex (or vice versa without a bonding primer) expands and contracts at different rates. After 2 or 3 seasonal temperature cycles, that stress cracks the film and peeling starts at the edges.
Step 1 – Remove All Loose and Peeling Paint
Start by scraping. Use your 3-inch putty knife held at a 30-degree angle and work under the loose edges. Do not dig into the surface, let the blade glide. You want to remove everything that is not firmly bonded, which sometimes means clearing a patch 4 to 6 inches larger than the visible peel.
Once the obvious flakes are gone, tap around the edges of the remaining paint with your knuckle. A hollow sound means there is more lifting underneath. Keep scraping until every tap sounds solid.
Sand the bare patch with 80-grit to feather the edges, then follow with 120-grit to smooth. Wipe the area with a damp rag and let it dry fully, at least 2 hours in a well-ventilated room before moving on.
Step 2 – Find and Fix the Moisture Source
Skipping this step is the single biggest reason repairs fail. If you prime and paint over an active moisture problem, you will be back here within 6 months.
Run your moisture meter over the bare drywall. A reading above 17% means the material is still wet and you cannot paint yet. Check nearby pipes, the ceiling above, and the exterior wall for signs of intrusion. In bathrooms, test the caulk around the tub and shower, failed caulk is responsible for a surprising number of wall peel cases.
Fix the source first. Patch a leaking pipe. Re-caulk the tub. Install or upgrade the bathroom exhaust fan (look for one rated at 50 CFM or higher for a standard 5×8 bathroom). Let the wall dry until the meter reads below 12%, that can take 3 to 10 days depending on how saturated the drywall is.
Step 3 – Fill, Sand, and Prime the Repair Area
Once the surface is dry and the moisture issue is resolved, apply a thin coat of spackling paste or joint compound to any dents, holes, or low spots. Feather the edges with a 6-inch knife. Let it dry completely (usually 45 to 60 minutes for spackling, longer for joint compound), then sand smooth with 120-grit.
Now prime. This step is non-negotiable. For bathroom walls or any area that saw moisture damage, use a shellac-based primer like Zinsser BIN. It seals stains, blocks odors, and bonds to problem surfaces better than water-based primers. For standard interior walls with no moisture history, a quality PVA drywall primer works well and costs around $18-$25 per gallon.
Apply one full coat, let it cure for the time listed on the label (typically 1 hour for shellac, 2-4 hours for latex primer), and lightly scuff with 220-grit before painting.
Step 4 – Apply Paint Correctly for a Lasting Bond
Thin, even coats beat thick single coats every time. Apply your first coat and let it dry for the time the manufacturer specifies, usually 2 to 4 hours for latex interior paint. Do not rush this. Painting over a tacky surface traps solvents and weakens adhesion.
Two coats is the minimum for a durable finish. Three coats are worth it on a repaired patch because the porous spackling absorbs the first coat differently than the surrounding wall. Feather each coat into the existing paint at the edges so the patch blends invisibly.
Use a quality 2.5-inch angled sash brush for edges and a 3/8-inch nap roller for flat areas. Cheap rollers leave lint in the finish and uneven texture, not the outcome you want after all this prep work.
Pro Tips for a Repair That Stays Put
A few habits separate a lasting fix from one that starts peeling again in year two.
> Pro tip: Test paint colors in both morning and evening light before committing to a full wall.
- Always check the relative humidity in the room before painting. Above 50% humidity, latex paint dries slower and bonds less reliably. A $15 hygrometer from any hardware store tells you in seconds.
- Never paint when the room temperature is below 50°F or above 90°F. Both extremes stress the film as it cures.
- On exterior walls, use a 100% acrylic exterior paint with a mildewcide additive. These formulas handle freeze-thaw cycles far better than standard latex.
- If you are painting over a glossy existing surface, scuff it with 150-grit sandpaper or apply a liquid deglosser before priming. Skipping this step cuts adhesion by roughly half.
- Keep a small amount of leftover paint (labeled with the room and date) for touch-ups. Even a 4-ounce container saves you a color-matching headache 3 years from now.
Common Mistakes That Cause Paint to Peel Again
The most common mistake is painting too soon after a water event. A wall that looks dry on the surface can still hold 15-20% moisture inside the drywall. Always use the meter.
Second on the list: skipping primer on a repaired patch. The spackled area is more porous than the surrounding wall, so unpainted joint compound soaks up your top coat unevenly, leaving a dull spot that peels at the edges within a year.
Third mistake: applying paint in one thick coat to “save time.” A single heavy coat traps moisture inside the film as it dries. The surface skins over while the inside stays wet, which creates micro-bubbles that eventually pop and lift the paint. Two thin coats, every time.
Finally, people often ignore the room’s ventilation after painting. Keep windows cracked or a fan running for at least 24 hours after the final coat. Proper airflow helps the film cure fully and reach its maximum hardness, which is what gives it long-term durability.
What to Do When Paint Keeps Peeling No Matter What
When you have done everything right and the wall still peels within 6 to 12 months, the problem is almost always structural. A persistent roof leak, a failed vapor barrier behind the drywall, or chronic high indoor humidity (above 60% year-round) will defeat any paint system you apply.
At that point, the repair is not a painting project anymore. You may need to cut out and replace the damaged drywall section, address the building envelope, or install a whole-house dehumidifier. A whole-house unit rated for 70 pints per day runs about $200-$350 and can drop indoor humidity from 65% to a stable 45% within a week.
Do not keep repainting over a structural problem. Each new layer adds weight and traps more moisture, making the eventual repair larger and more expensive. Diagnose first, fix second, paint last.
If you are dealing with peeling on wood trim or exterior siding, the same moisture-first logic applies, but the repair sequence and primer choices differ slightly. Understanding how paint adhesion works on different substrates is the natural next step once your interior walls are sorted.
When you implement why is paint peeling on walls, revisit the checklist above against your real constraints.
Frequently Asked Questions
Why does paint peel in the bathroom more than anywhere else?
Bathrooms generate steam every time someone showers, and that moisture condenses on cool wall surfaces. Without a properly rated exhaust fan running during and for 15 minutes after every shower, walls stay damp for hours. That repeated wet-dry cycle breaks down paint adhesion faster than almost any other factor.
Can I paint directly over peeling paint without scraping first?
No. Painting over loose paint traps the failing layer underneath, and the new coat will peel along with it – usually within 3 to 6 months. Scraping back to a solid edge is the minimum prep required for any repair to hold.
How long does a properly repaired wall last before needing repainting?
A well-prepped interior wall painted with quality latex should hold up for 7 to 10 years under normal conditions. Bathrooms and kitchens see more wear and may need a fresh coat every 4 to 5 years, especially around high-steam areas.
Is peeling paint a health risk?
In homes built before 1978, peeling paint may contain lead. Disturbing it by scraping creates dust that is hazardous to breathe. Use an EPA-certified lead test kit before scraping any paint in an older home, and follow safe work practices if lead is detected.
What primer is best for preventing paint from peeling again?
For moisture-prone areas, shellac-based primer (Zinsser BIN is the go-to) gives the strongest stain-blocking and adhesion. For standard dry walls, a PVA primer or a bonding primer like Zinsser Bulls Eye 1-2-3 works well and costs around $20-$30 per gallon.
